How To Add Milwaukee Packout Accessories to A 2 Drawer And 3 Drawer Tool Box
Share
Milwaukee Packout Tool Boxes Are A Great Way to Customize Your Work Set-Up.
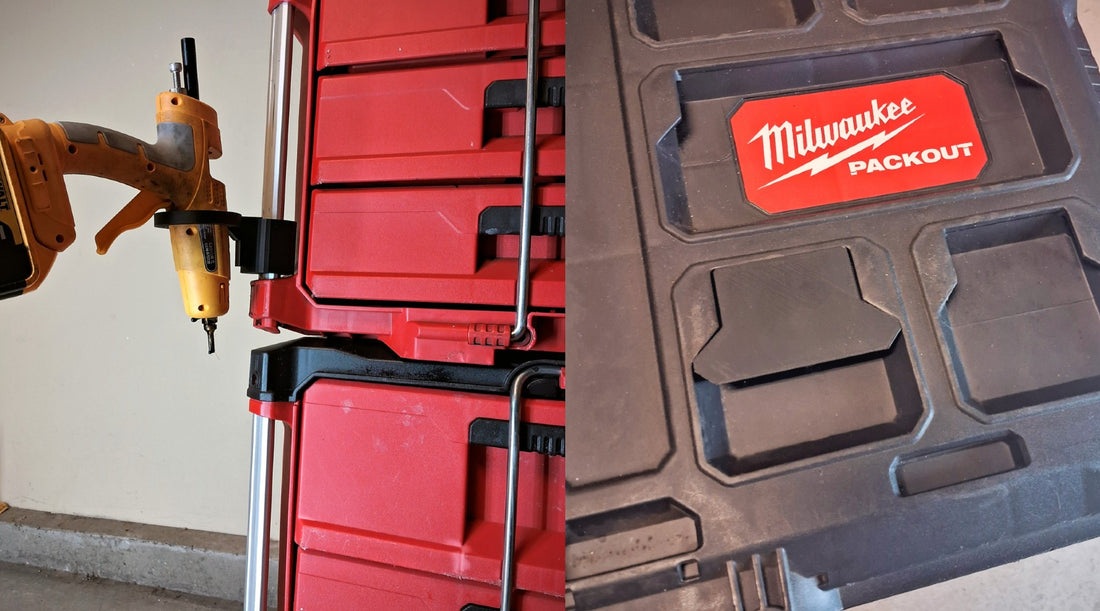
The great thing about Milwaukee's 2 drawer, 3 drawer, and now 4 drawer Packout boxes is that they contain what other Packout systems don't have. That is vertical rails that allow for aftermarket accessories to be mounted on the side of the tool-kit.

A photo of the vertical rails on a Milwaukee 2 drawer tool box to the right are some Paintless Dent Repair rods.
By allowing you to mount tools made for a specific purpose, like the Paintless Dent Repair tools offered at 3DPaintless.com, the customization options are endless. And while we go over some of the useful tools that can be added for PDR in another blog, the question that I would like to address here is how do I add Packout Accessories to my Milwaukee Packout?
Accessing the Rails On A Milwaukee Packout Tool Box
Accessing the rails on your Milwaukee Packout is pretty simple. If you prefer to watch a video where I discuss this you can find it here. The tools that you will need are a very thin Phillips head screwdriver and a large flat head screwdriver for prying. If you don't have a thin Phillips head, a flat head will work. It just needs to be thinner than 1/4" so it can fit inside the cap on the bottom of the Packout toolbox. If absolutely necessary you can drill out the hole on the cap to fit a larger diameter screwdriver. Be very careful and drill slowly if you are going to do this, because you don't want to accidentally drill into the head of the screw.

Pointing out the screw cap on the bottom of a Milwaukee Packout 3 drawer tool box.
Once the screw is loosened you can pry off the cap with a flat head screwdriver.
Prying The Rail Out To Add On your Milwaukee Accessories
Flip the Packout box face-up as if you were using it. Now we're going to use our large flat-head screwdriver and place between the black Milwaukee Packout top and the red portion below it on the side closest to the drawers.

You will want to pry a bit and, if necessary, twist the screwdriver to give you a bit more leverage. The rail should eventually pop out from the bottom. You now have the space to insert your Milwaukee Packout accessory.
Putting You Packout Tool Box Back Together
Next you will want to assemble your toolbox again. What you'll need to do is push the Packout rail back into place. you may need to push upward on the rail as you guide it back into the hole.

With the rail back in its position, you'll flip the Milwaukee Packout box on its back so that you can access the bottom cap again. Put the cap on and screw it back on. Now you're finished putting you Milwaukee Packout accessory on.
Shameless Self Promotion
Since you now know how to add Milwaukee Packout accessories to your Packout tool box, you can now customize it however you want! I sell some very cool products at 3DPaintless.com. Some of these include Magnetic Cleats for Milwaukee Packout, an Umbrella Mount, and a Glue Gun Holder. Go check them out and let me know if you have any ideas that you would like to see. You can e-mail me at 3DPaintless@gmail.com. I also sell some great Paintless Dent Repair tools that I'm excited for PDR techs to try.
